Craftsman Pressure Washer Manual: A Comprehensive Guide
This manual details Craftsman pressure washers, focusing on the crucial blend of pressure (PSI) and flow (GPM) for optimal cleaning performance and longevity․
Understanding Your Craftsman Pressure Washer
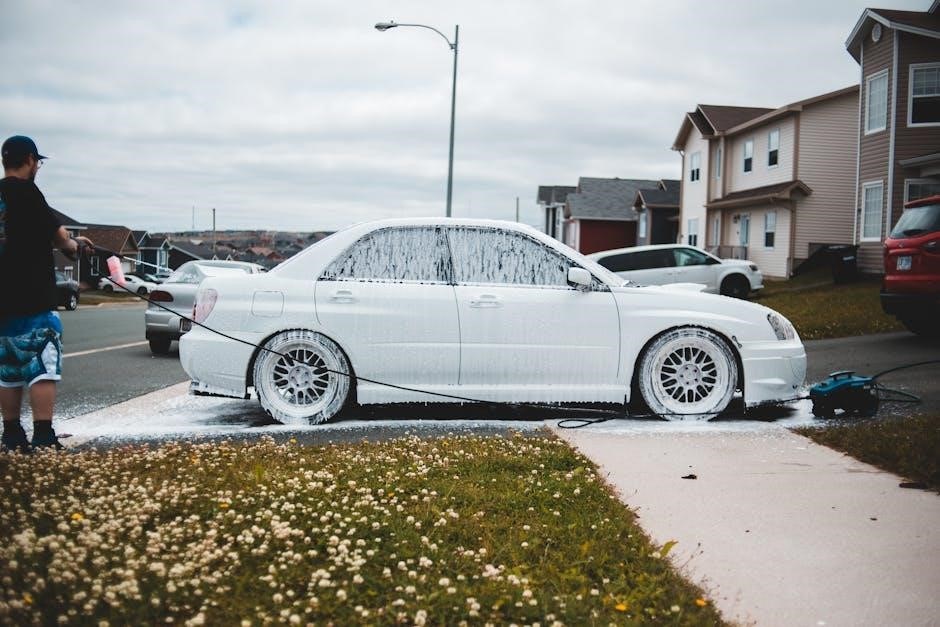
Your Craftsman pressure washer is a powerful cleaning tool, designed for a variety of outdoor tasks, from washing vehicles to revitalizing decks and siding․ Understanding its core functionality – the interplay between pressure, measured in pounds per square inch (PSI), and flow rate, quantified in gallons per minute (GPM) – is paramount for safe and effective operation․
Higher PSI indicates the force of the water stream, determining its ability to dislodge stubborn dirt and grime․ Conversely, GPM dictates the volume of water delivered, influencing the overall cleaning speed and area coverage․ Craftsman offers diverse models, encompassing both gas and electric options, each tailored to specific cleaning demands and user preferences․ This manual will guide you through the specifics of your model, ensuring you harness its full potential while prioritizing safety and extending its lifespan․ Familiarize yourself with all components before initial use․
Safety Precautions & Warnings
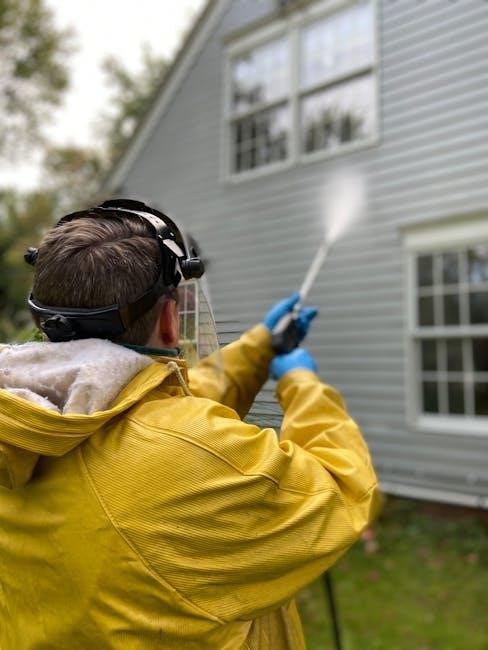
Operating a pressure washer involves inherent risks; therefore, strict adherence to safety guidelines is crucial․ Always wear safety glasses or goggles to protect your eyes from debris and potential water spray․ Closed-toe shoes are mandatory to safeguard your feet․ Never point the wand at yourself or others, as the high-pressure stream can cause severe injury․
Before connecting to the power source or fuel supply, inspect the machine for any damage․ Ensure all connections are secure to prevent leaks․ Avoid operating the pressure washer near electrical sources or flammable materials․ Never alter the factory-set safety features․ Keep children and pets away from the operating area․ Disconnect the power or fuel supply before performing any maintenance or repairs․ Read and understand this entire manual before use to mitigate potential hazards․
Key Components & Their Functions
A Craftsman pressure washer comprises several key components working in unison to deliver effective cleaning power․ The engine (gas models) or motor (electric models) provides the power source․ The pump generates high-pressure water flow, measured in PSI and GPM․ The high-pressure hose safely conveys water from the pump to the trigger gun and wand․
Nozzles attach to the wand, controlling spray pattern and intensity․ A detergent tank (if equipped) allows for soap application․ The frame provides structural support, while various controls manage operation․ Understanding each component’s function is vital for proper use and maintenance, ensuring optimal performance and extending the lifespan of your pressure washer․
Nozzle Selection & Usage
Choosing the correct nozzle is paramount for effective and safe pressure washing․ Nozzles dictate spray pattern and intensity, directly impacting cleaning results and surface protection․ A 0-degree nozzle delivers a concentrated, powerful stream for stubborn dirt, but can damage surfaces – use with extreme caution․ A 25-degree nozzle offers an all-purpose spray, suitable for most cleaning tasks around the home․
40-degree nozzles provide a wider, gentler spray ideal for delicate surfaces like painted wood or vehicles․ Always start with a wider angle nozzle and gradually decrease the angle if more cleaning power is needed․ Regularly inspect nozzles for clogs and ensure they are securely attached before operation․
High-Pressure Hose & Connections
The high-pressure hose is a critical component, safely conveying water at significant force․ Inspect the hose before each use for cracks, bulges, or abrasions – never use a damaged hose․ Ensure all connections are tight and secure, utilizing the quick-connect fittings properly․ Avoid kinking or sharply bending the hose, as this can compromise its integrity and reduce water flow․
Properly connect the hose to both the pressure washer pump and the trigger gun․ Always disconnect the hose from both ends before storing the unit․ Never attempt to repair a damaged hose; replace it immediately with a genuine Craftsman replacement part․ Regularly check the connections for leaks while the pressure washer is running․
Trigger Gun & Wand Assembly
The trigger gun controls water flow, while the wand directs it to the cleaning surface․ Before use, ensure the wand is securely locked into the trigger gun․ The trigger features a safety lock; engage it when not in use to prevent accidental activation․ Inspect the trigger for smooth operation and responsiveness – any stiffness should be addressed․
Properly attach nozzles to the wand, ensuring a firm click indicates a secure connection․ Avoid forcing the nozzle, as this can damage the threads․ Regularly check the wand for any signs of bending or damage․ Never point the wand at yourself or others, even with the trigger locked․ Always release the trigger pressure before adjusting the nozzle․
Pressure Washer Types: Gas vs․ Electric
Craftsman offers both gas and electric pressure washers, each suited for different needs․ Gas-powered models deliver higher PSI and GPM, ideal for heavy-duty tasks like stripping paint or cleaning large areas․ They offer portability, not relying on a power outlet, but require more maintenance – oil changes, spark plug replacements, and fuel stabilization are essential․
Electric pressure washers are lighter, quieter, and require less maintenance․ They are perfect for lighter tasks like washing cars, decks, and siding․ However, their PSI and GPM are generally lower, and they are limited by cord length or the availability of an electrical outlet․ Consider the size of your cleaning projects and power source accessibility when choosing․
Starting a Gas-Powered Craftsman Pressure Washer
Before starting, ensure the oil level is correct and the fuel tank is filled with fresh gasoline․ Always check for leaks․ Begin by turning the fuel valve to the ‘ON’ position․ Next, set the choke to ‘START’ – this provides a richer fuel mixture for cold starts․ Engage the ignition switch and firmly pull the starter cord until the engine sputters, then move the choke to the ‘RUN’ position and pull again․

If the engine doesn’t start after several attempts, recheck the fuel level, oil level, and choke setting․ Allow the engine to warm up for a few minutes before connecting the high-pressure hose and nozzle․ Never operate a gas-powered pressure washer indoors or in a poorly ventilated area․
Fueling & Oil Checks
Prior to each use, meticulously inspect the oil level using the dipstick; add SAE 30 oil if needed, ensuring it isn’t overfilled․ Always use fresh gasoline with a minimum octane rating of 87․ Fuel should be added outdoors, away from any open flames or sparks, and the engine must be completely cooled down․
Carefully remove the fuel cap and use a funnel to prevent spills․ After fueling, securely tighten the cap․ Regularly check for fuel leaks around the tank and fuel lines․ Maintaining proper oil and fuel levels is crucial for engine performance and longevity, preventing damage and ensuring safe operation․ Never use stale or contaminated fuel․
Ignition & Choke Operation
To start the engine, ensure the power switch is in the “ON” position․ For a cold start, move the choke lever to the “CHOKE” position; this enriches the fuel mixture for easier ignition․ After the engine attempts to start (typically within a few pulls), gradually move the choke lever to the “RUN” position․

If the engine fails to start, repeat the process, avoiding excessive cranking․ Once running, allow the engine to warm up for a few minutes before applying full throttle․ The ignition system is designed for reliable starting, but proper choke operation is vital, especially in colder temperatures․ Always disconnect the spark plug wire before performing any maintenance․
Starting an Electric Craftsman Pressure Washer
Electric Craftsman pressure washers offer convenient, corded operation․ Before starting, verify the power cord is undamaged and the GFCI outlet is functioning correctly – this is crucial for safety․ Ensure the water supply is connected and the unit is adequately primed according to the initial setup instructions․
Simply plug the power cord into the GFCI outlet and turn the power switch to the “ON” position․ The motor should start almost instantly․ If it doesn’t, check the GFCI outlet and ensure the water supply is fully open․ Never operate an electric pressure washer without a functioning GFCI outlet․ Always disconnect the power cord before performing any maintenance or adjustments․
Power Cord & GFCI Outlet Requirements

Your Electric Craftsman pressure washer requires a dedicated 120V, 15 or 20-amp circuit․ Utilizing an extension cord is discouraged, but if absolutely necessary, it must be a heavy-duty, 14-gauge or larger cord, and no longer than 25 feet to prevent voltage drop and potential motor damage․
Crucially, operation demands a Ground Fault Circuit Interrupter (GFCI) outlet․ A GFCI outlet instantly cuts power if a ground fault is detected, significantly reducing the risk of electric shock․ Never bypass or disable the GFCI protection․ Regularly test the GFCI outlet according to the manufacturer’s instructions to ensure it’s functioning correctly․ Improper grounding or use of a non-GFCI outlet voids the warranty and poses a serious safety hazard․
Initial Setup & Water Supply Connection
Before first use, carefully inspect all components for damage during shipping․ Attach the high-pressure hose to both the pressure washer pump and the trigger gun, ensuring secure connections․ Connect a standard garden hose to the water inlet on the pressure washer; a water filter is recommended to prevent debris from entering the pump․
Ensure the water supply provides at least 20 PSI of water pressure․ Turn on the water supply fully before starting the pressure washer․ This prevents damage to the pump from running dry․ Purge the hose by briefly squeezing the trigger gun to remove any air․ Always check for leaks at all connections before operation․ A stable water supply is critical for consistent performance․
Operating Instructions: Basic Usage
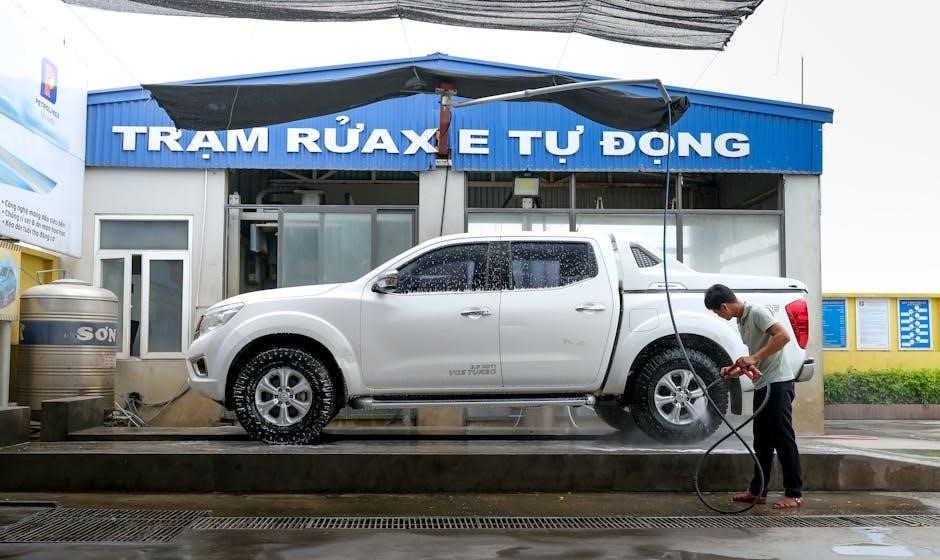
After completing the initial setup and ensuring a stable water supply, you’re ready to begin․ Start the pressure washer according to the instructions for your model (gas or electric)․ Once running, gradually squeeze the trigger gun to initiate the high-pressure spray․ Begin with a wider-angle nozzle (like 25 or 40 degrees) and test on an inconspicuous area first to assess the cleaning power․
Maintain a safe distance from the surface you’re cleaning – typically 8-12 inches․ Use sweeping motions, overlapping each pass slightly, for even cleaning․ Avoid prolonged spraying in one spot to prevent damage․ Release the trigger to stop the water flow when not actively cleaning․ Always prioritize safety and wear appropriate protective gear․
Adjusting Pressure Settings (PSI)
Many Craftsman pressure washers offer adjustable pressure settings, allowing you to tailor the cleaning power to the task at hand․ This is typically controlled via a pressure regulator knob or dial located on the unit․ Lowering the PSI is crucial for delicate surfaces like painted wood or car finishes, preventing damage․ Higher PSI settings are ideal for stubborn dirt, grime, and concrete cleaning․
Always start with the lowest pressure setting and gradually increase it until you achieve the desired cleaning result․ Observe the surface carefully for any signs of distress․ Remember, higher pressure isn’t always better; it can cause etching or stripping․ Understanding your washer’s PSI range and adjusting accordingly ensures effective and safe cleaning․
Detergent Application & Soap Nozzles
Craftsman pressure washers often feature a built-in detergent tank for convenient soap application․ To utilize this, fill the tank with a pressure washer-specific detergent – household cleaners can damage the pump․ Switch to the soap nozzle (typically white) which introduces air into the water stream, creating a foamy solution․
Adjust the detergent flow rate using the dilution knob, controlling the soap-to-water ratio․ Begin with a lower setting and increase as needed․ Apply detergent from the bottom up to prevent streaking․ Allow the detergent to dwell for a few minutes before rinsing with a clean water nozzle․ Always consult the detergent manufacturer’s instructions for proper dilution and usage guidelines․
Maintenance & Troubleshooting
Regular maintenance extends the life of your Craftsman pressure washer․ After each use, disconnect the water supply and trigger gun, then drain any remaining water to prevent freezing and corrosion․ Periodically inspect the nozzles and filters for clogs, cleaning them with a pin or nozzle cleaning tool․
If the pressure drops, check for kinks in the hose, a clogged nozzle, or a low water supply․ For starting issues, ensure proper fuel levels (gas models) or a functioning GFCI outlet (electric models)․ If the engine stalls, check the oil level․ Always refer to the full manual for detailed troubleshooting steps and safety precautions before attempting any repairs․
Cleaning Nozzles & Filters

Maintaining clean nozzles and filters is vital for optimal performance․ Clogged nozzles reduce pressure and create uneven spray patterns; inspect them regularly for debris․ Use a nozzle cleaning tool – a thin wire or pin – to carefully clear any obstructions from the nozzle orifice․ Never use drills or larger objects, as these can damage the nozzle․
Filters, both water inlet and potentially a detergent filter, should also be checked frequently․ Remove and rinse the water inlet filter under running water, removing sediment and particles․ Detergent filters, if equipped, require similar cleaning to prevent soap buildup․ A clean system ensures consistent pressure and prevents damage to the pump․
Winterizing Your Pressure Washer
Proper winterization prevents freeze damage to your Craftsman pressure washer․ First, disconnect the water supply and trigger the gun to relieve remaining pressure․ Next, pump any remaining water from the pump and hoses; using pump saver fluid is highly recommended․ This fluid coats internal components, preventing corrosion and freezing․

Disconnect and drain the high-pressure hose, storing it in a coil․ For gas-powered models, stabilize the fuel or drain the tank completely to prevent gumming․ Remove the spark plug and add a teaspoon of oil into the cylinder, then pull the starter cord several times․ Store the unit in a dry, protected location, covered to prevent dust accumulation․
Common Problems & Solutions
If your Craftsman pressure washer fails to start, check the fuel level (gas models) or power connection (electric)․ A weak spray often indicates a clogged nozzle – soak it in vinegar or use a nozzle cleaning tool․ Erratic pressure can stem from air in the system; turn off the unit and allow it to sit, then restart․
Overheating may signal low oil (gas models) or a blocked cooling fan․ If the trigger doesn’t engage, inspect the trigger assembly for debris or damage․ Always ensure the water supply is fully open and free of obstructions․ For persistent issues, consult a qualified technician or Craftsman’s support resources․
Understanding PSI and GPM
PSI, or pounds per square inch, measures the force of the water stream – higher PSI equates to more powerful cleaning․ However, PSI alone isn’t the whole story․ GPM, gallons per minute, indicates the volume of water delivered․ A higher GPM means faster rinsing and removal of debris․
The ideal balance depends on the cleaning task․ For delicate surfaces, lower PSI and moderate GPM are preferred․ Heavy-duty cleaning, like removing stubborn grime, requires higher PSI and GPM․ Understanding this combination allows you to select the appropriate nozzle and pressure setting for effective and safe operation with your Craftsman pressure washer․
Choosing the Right Nozzle for the Job
Selecting the correct nozzle is vital for effective and safe pressure washing․ Nozzles control the spray pattern and intensity․ 0-degree nozzles deliver a concentrated, pencil-thin stream for intense cleaning of small, durable areas – use with extreme caution! 25-degree nozzles are all-purpose, suitable for most household tasks like siding, decks, and driveways․
40-degree nozzles provide a wider, gentler spray ideal for delicate surfaces like cars or painted wood․ Always test a small, inconspicuous area first․ Incorrect nozzle selection can damage surfaces or reduce cleaning efficiency․ Refer to your Craftsman manual for specific recommendations based on your model and cleaning needs․
0-Degree Nozzles: For Intense Cleaning
Zero-degree nozzles produce an extremely powerful, highly concentrated spray stream․ This intense pressure makes them ideal for blasting away stubborn dirt, grime, and old paint from durable surfaces like concrete․ However, extreme caution is absolutely necessary! Never use a 0-degree nozzle on wood, vinyl siding, car paint, or any softer material․
Improper use can cause significant damage, etching or even stripping the surface․ Maintain a safe distance – at least several feet – and always wear safety glasses․ These nozzles are best suited for experienced users who understand the potential risks․ Always consult your Craftsman manual for specific warnings and recommended applications before utilizing a 0-degree nozzle․
25-Degree Nozzles: All-Purpose Cleaning
The 25-degree nozzle is often considered the “go-to” option for a wide range of cleaning tasks around the home․ It delivers a powerful, yet manageable, spray pattern that’s effective on most surfaces, including siding, brick, and concrete․ This versatility makes it an excellent choice for general cleaning projects․
It’s strong enough to remove dirt and grime, but gentle enough to avoid causing damage to many common materials․ When using a 25-degree nozzle, start with a wider spray pattern and gradually narrow it as needed․ Always test on an inconspicuous area first to ensure compatibility․ Refer to your Craftsman pressure washer manual for specific recommendations and safety guidelines․
40-Degree Nozzles: Gentle Cleaning
The 40-degree nozzle is designed for delicate cleaning tasks where a less aggressive spray is required․ This nozzle produces a wider, lower-pressure spray pattern, making it ideal for surfaces that are easily damaged, such as painted wood, car finishes, or windows․ It’s perfect for rinsing away loose dirt and debris without causing harm․
When tackling sensitive areas, the 40-degree nozzle minimizes the risk of stripping paint, etching glass, or otherwise damaging the underlying material․ Always maintain a safe distance from the surface and test in an inconspicuous spot before proceeding․ Consult your Craftsman pressure washer manual for detailed instructions and safety precautions regarding nozzle usage․
Repairing Common Issues
Addressing minor problems yourself can save time and money․ Common issues include a pressure washer that won’t start, low pressure output, or leaks․ First, consult your Craftsman pressure washer manual for specific troubleshooting steps related to your model․ Check the fuel line (gas models) or power cord (electric models) for damage․
For low pressure, inspect the nozzles for clogs and the water inlet filter for obstructions․ If the engine won’t start, ensure proper fuel levels and spark plug condition (gas models)․ Always disconnect the power source or fuel line before attempting any repairs․ If you’re uncomfortable performing repairs, seek assistance from a qualified technician․
Finding Replacement Parts
Locating replacement parts for your Craftsman pressure washer is crucial for maintaining its performance․ Start by identifying your model number, typically found on a sticker affixed to the unit․ Sears PartsDirect is a primary resource, offering a vast catalog of Craftsman components․ Alternatively, many online retailers specializing in power equipment parts carry Craftsman replacements․
When ordering, ensure the part number matches your specific model to guarantee compatibility․ Local hardware stores may also stock common parts like nozzles, hoses, and filters․ Consider the warranty status of your pressure washer before purchasing parts, as some repairs may be covered․ Always prioritize genuine Craftsman parts for optimal fit and durability․
Craftsman Pressure Washer Warranty Information
Craftsman pressure washers typically come with a limited warranty covering defects in materials and workmanship․ Warranty duration varies by model, ranging from one to several years, so carefully review your purchase documentation․ The warranty generally covers the pump, engine (for gas models), and frame, but may exclude wear items like nozzles and hoses․
To make a claim, retain your proof of purchase and contact Sears Customer Service or visit their website․ Warranty service may require returning the unit to an authorized service center․ Modifications or misuse can void the warranty․ Registering your product online can streamline the warranty process․ Always adhere to the maintenance schedule outlined in this manual to maintain warranty validity․